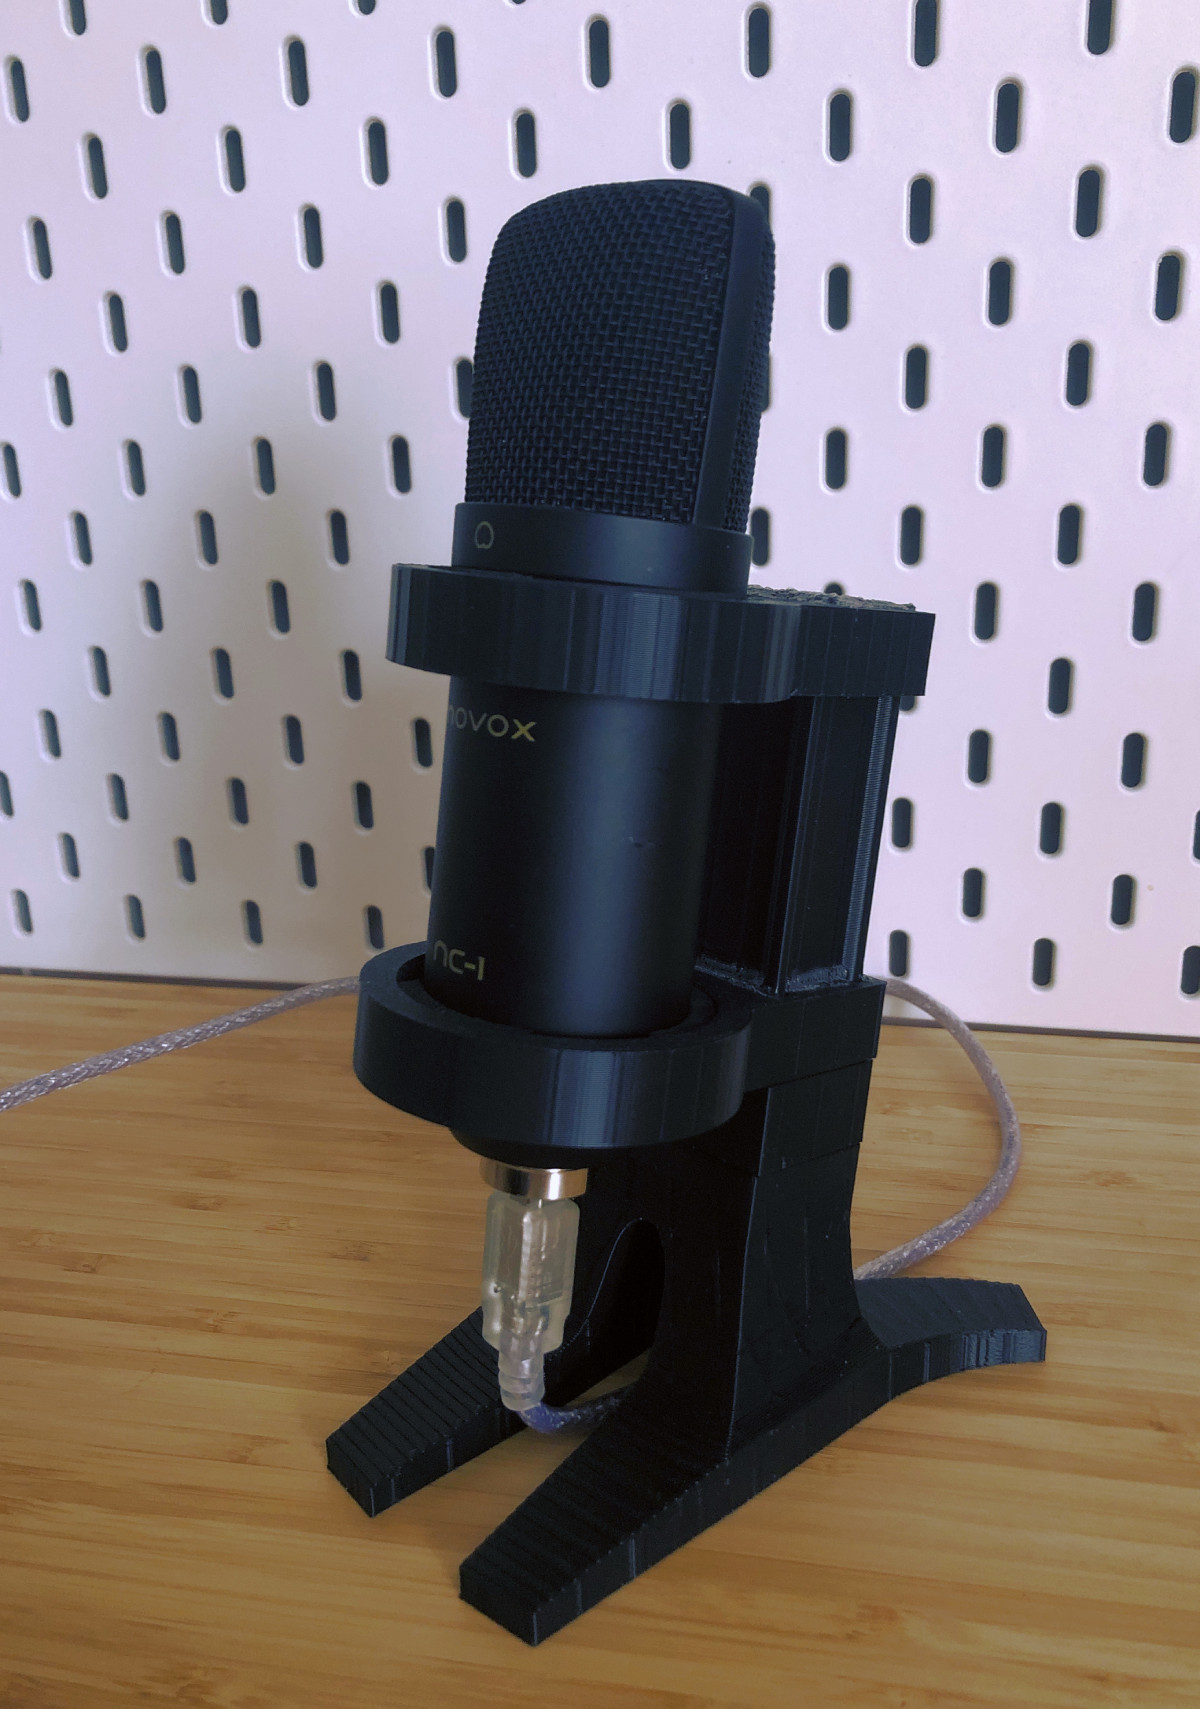
Microphone stand for Novox NC-1 microphone
I like the idea of small, weekend projects. Something small you can make in a weekend. I’ve used the last two days to play around with an idea for a microphone stand. That’s because the microphone stand I’ve got when buying the microphone is really, really bad. It’s unstable and can barely hold the weight of the microphone, which in my case is the Novox NC-1 microphone. It’s a good entry level microphone, which I’ve used to record most of my YouTube videos.
I wanted something stable I can 3D print. I also knew that I want to use the EVA foam to isolate the microphone from the rough 3D printed surface (I don’t want to scratch it…). I’m hoping it will also provide some dampening effect on the mechanical vibrations. It probably won’t be anything noticeable though.
Enough talk. You can see the stand below:
Since there is a lot of hanging elements in this design, printing as one piece would be pretty difficult. First of all it would require a lot of supports (additional material used and cleaning required) and any mistakes fixing means printing the whole piece. I’ve split the design into more modular one.
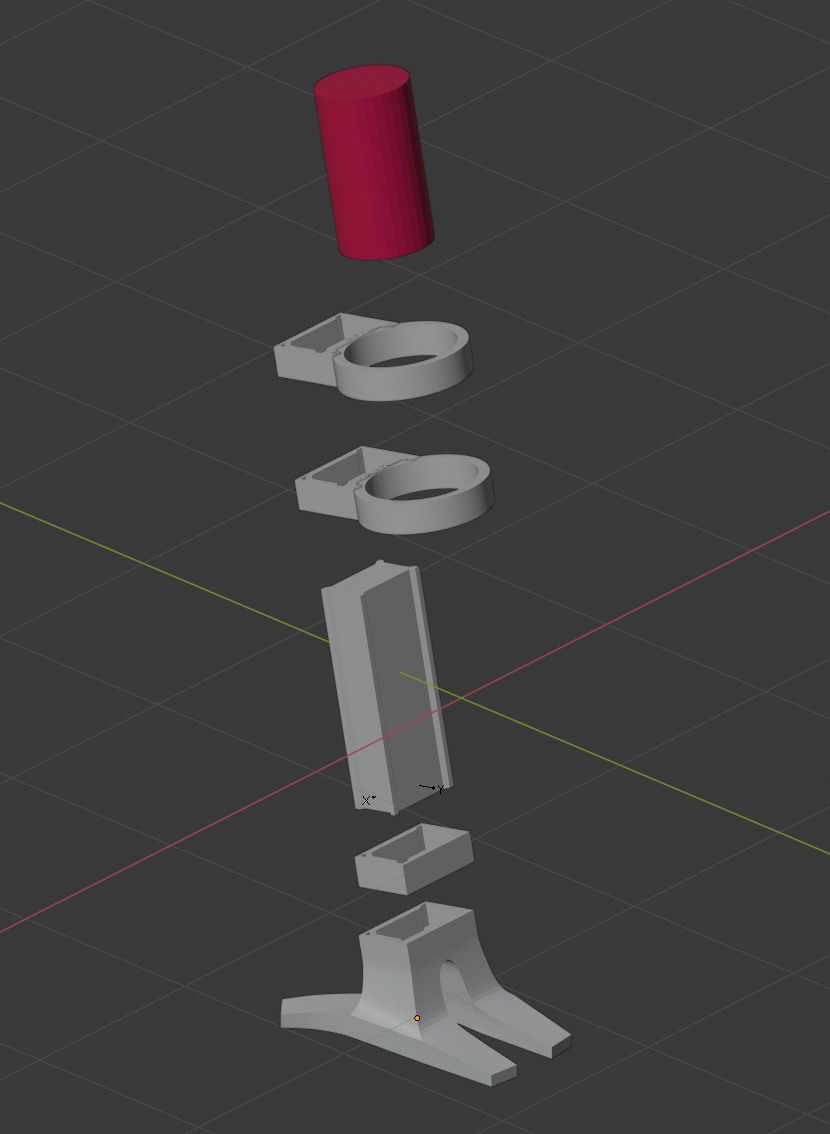
The red cylinder represents the important part of the microphone. As you can seen there is a shaft that gets mounted in the base. Two rings slide on the shaft. Unfortunately one small element between lower ring and the base had to be added. That way the lower ring rests on a fixed element, and doesn’t just hang there hoping the glue will hold. It could have been solved by making the base taller, so the shaft would go deeper.
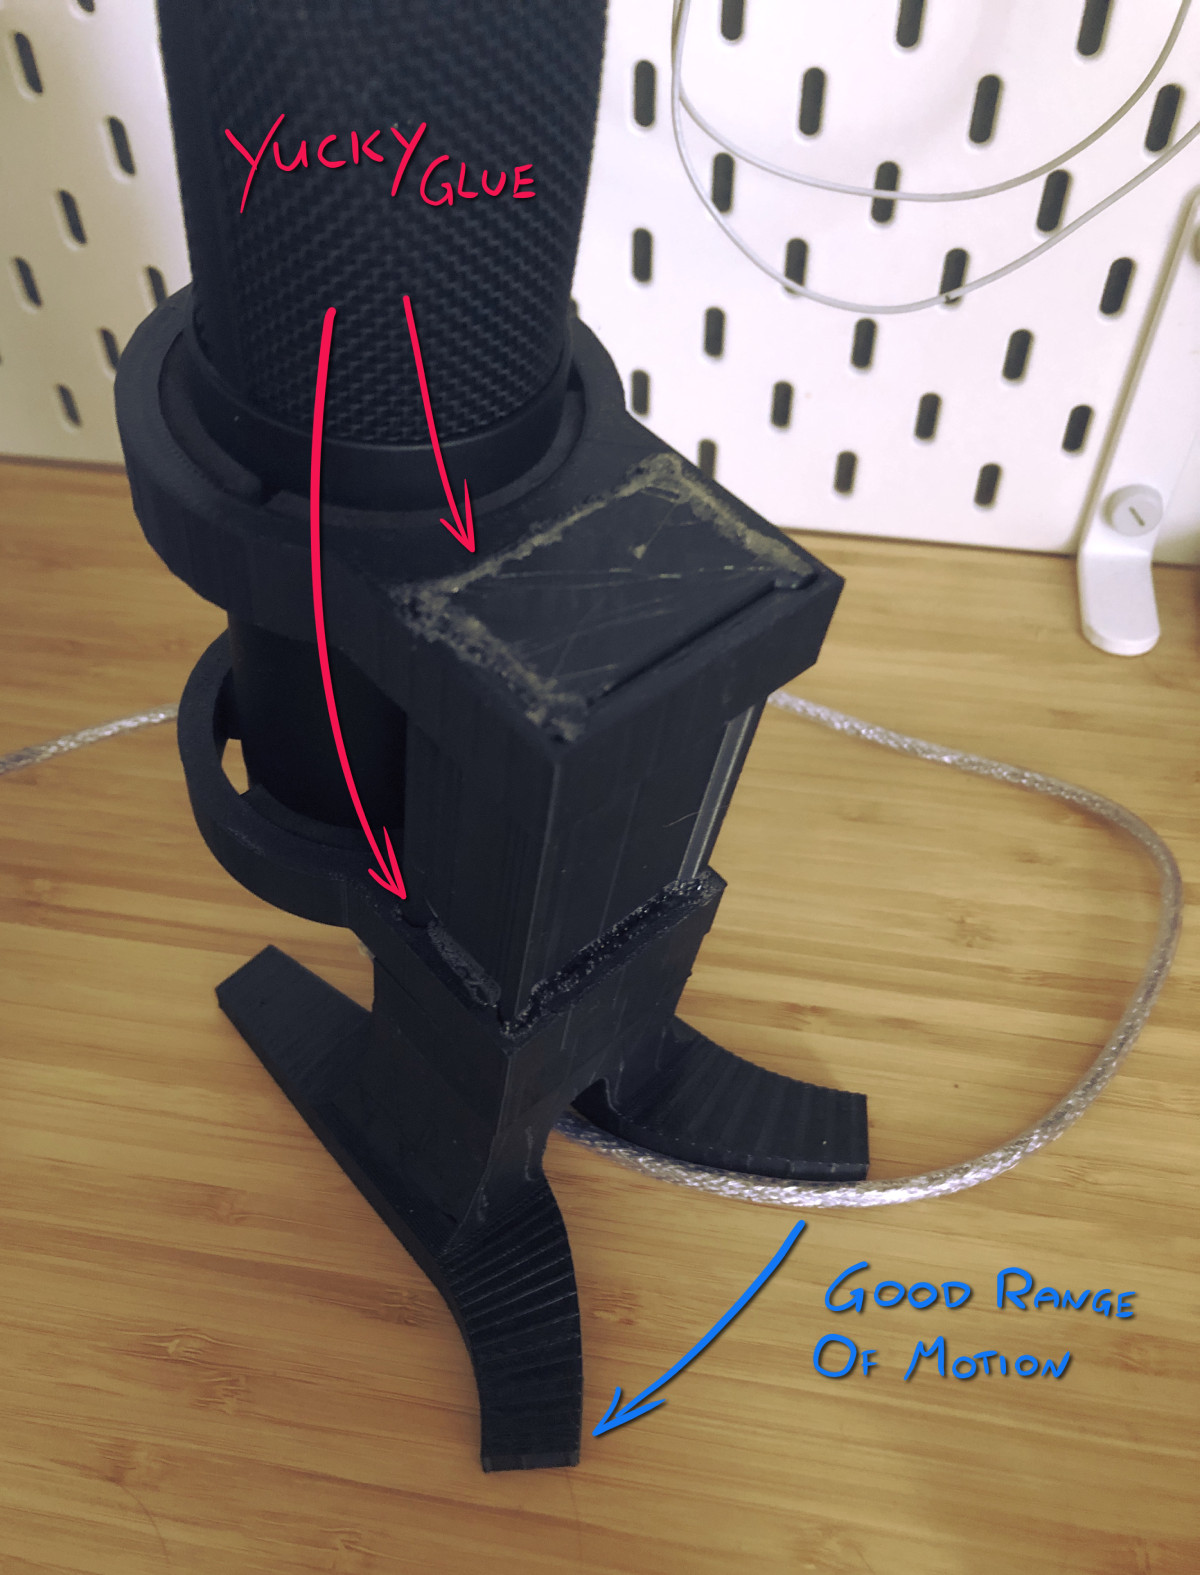
Below you can see some takeaways. I’ve used a universal glue to put it all together. It does the job but takes a while to dry (24h…) and doesn’t look particularly well if you use it on the outer surfaces. The EVA foam holds the microphone very firmly. The space I’ve left between the microphone diameter and the rings diameter was exactly what I needed to put the EVA foam in. First try without measuring the thickness of the foam…

I’m pretty happy with the shape in the back, that gives a good range of motion to the, pretty thick cable. Why are USB-B cables so thick and ugly?
When I assembled it, I wasn’t happy with the result. The fixed angle, at which the microphone leans ,isn’t the best, but that convinced me that a screw mechanism for changing that angle would be a great addition. It is an improvement over the original stand. I’ve also learned a bit - mostly around 3D printing and a few new Blender tricks. I might improve this design. I might move to something else.
Things that you should always remember when working on projects like this one:
- you can’t expect the first iteration to be close to a final design. It’s important to recognize how many things you don’t take into consideration, when you start playing around with an idea.
- you have to take into account the process you’re going to use because it affects the design. 3D printing has its limitations just like any other process. Since printing big, complex pieces might be difficult and force you to deal with supports, modularize the design from the beginning.
One way or another, weekend projects are cool. If you have some time to spare, make something small.
If you want to play around with the design you can find the Blender project file here. You have to export the parts yourself if you want to print it. Since you need EVA foam and glue a proper instruction would be useful, which I didn’t prepare. That’s why it’s not a ready to print project.