Adding comments system to this website
I’ve started this website with the Beautiful Hugo theme. At that point in time I was learning how Hugo works. I knew I wanted to design my own theme, only because I like customizing and designing. The theme I’m currently using was designed and written by me. I’m not a web developer so it’s not professional quality. It’s made by me - that’s what matters. I’ve never implemented a comments system in my own theme. That has recently changed! This website doesn’t generate, what people in this lovely place called “internet” call, traffic. This doesn’t change a thing though. The goal was always to share what I’ve learned. Some problems don’t deserve to be solved twice. If I’ve struggled with something silly, you shouldn’t. What if you struggle with something I didn’t consider to be problematic? Then you should be able to easily ask me about it. That’s the reason why introducing comment system seemed to be worth my time.
There is quite a few comment systems you can choose from. The most popular seems to be Disqus. It’s not free and the consensus seems to be that they don’t respect users data. Then there is ReplyBox. They claim that it doesn’t track users. It has a free plan. It actually looks pretty decent. Then there is Isso. It’s a self-hosted, open-source comment system. That’s a lot of buzz words I like. Self-hosting means that you are responsible for setting up a machine that handles the comments database queries. It adds more responsibilities on the user, which isn’t that great… You get something in return. You own the data. You can move to a different system pretty easily. Isso seems to be well maintained and I deeply respect open-source projects. I’ve decided to go with Isso.
Process of setting Isso up is pretty easy. You can go the Docker route but since it’s a Python project you can just do the following:
python3 -m venv /home/user/venv_isso
source /home/user/venv_isso/bin/activate
pip3 install isso
You can quickly start Isso in the background by running
nohup isso -c path/to/the/config/file &I’m running my Isso instance on a Vultr server. That instance needs to know a few things to handle the database queries. You can provide that information via the config file. You can find an example of a config file in the Isso’s repository on GitHub (link). A basic setup requires setting up:
- the path where Isso will store the database (
dbpath) - the interface to listen on (
listen), formathttp://domain.name:PORTorhttp://IP:PORT. I’m using DuckDNS service to get a free domain name.
You also need to insert a snippet that will embed the comment system in your website. Since I’m using Hugo my client side snippet looks like so:
{{ if .Site.Params.comments }}
  <script data-isso="https://myDuckDNSDomain.duckdns.org/" data-isso-css="false" data-isso-require-author="true" src="https://myDuckDNSDomain.duckdns.org/js/embed.js"></script>
  <section id="isso-thread" data-title="{{replaceRE "(\\s)" "_" (lower .Title)}}"></section>
{{ end }}
I’ve added this to the single.html template. I’ll soon wrap it into a shortcode.
Ok, ok, ok! The final result:
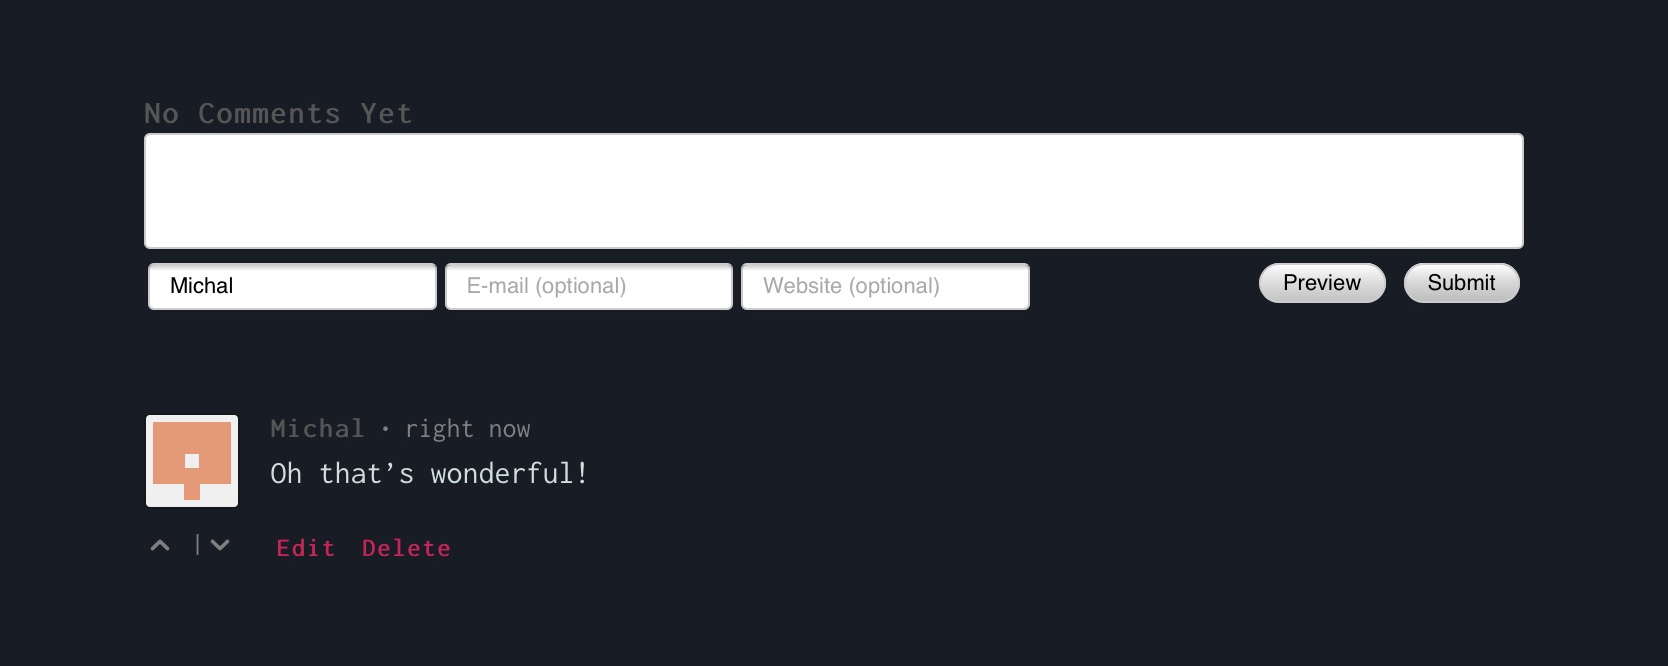
It works! It doesn’t necessarily fit with the theme of the website. I’ve actually created a copy
of the CSS code that Isso uses and include it in the <head>. That way I can customize the look
of the comment system.
I’ve tried to quickly mockup a look that would use the colors used in this theme.
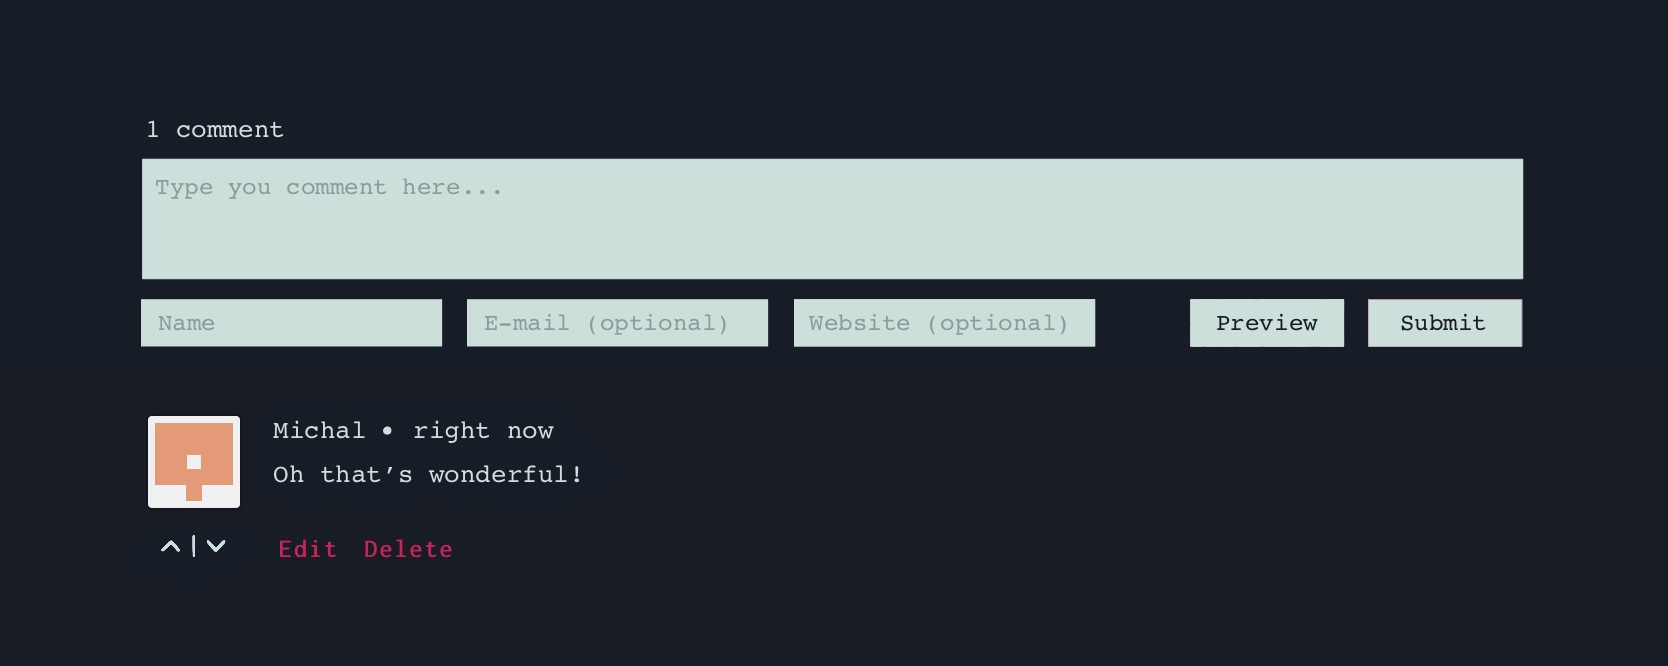
I’m not that happy with the result. The grayish color, I use for the text color, seems to be pushed towards greenish hue. It doesn’t look that good. This certainly needs some work.
I’m not a web developer and I’ve never asked myself how comment systems work. Yes, reasoning about how they work would bring me pretty close to the right answer, but it was pretty interesting to go through the steps of setting a system like the by myself.
On 2020/08/15 I’ve moved to Commento… it’s way easier to setup. I might create a new post about that…