Connecting Ender3 to WiFi with ESP32
If you dabble in 3D printing, you’ve probably stumbled upon the OctoPrint project. It’s a web interface for your printer. It’s a very cool project with lots of features. The typical use case is to host OctoPrint on a Raspberry PI. That requires a bit of fiddling around if you want to power it from the printer’s power supply. It’s a very popular project so finding instructions on how to do it isn’t difficult.
My experience with OctoPrint is very positive. I’m not using it though and I don’t see a reason to start using it anytime soon. That’s because adding an entire computer isn’t free. I’m not talking about buying the hardware (which I already own). The cost is the maintenance. Raspberry Pi type computers are pretty delicate. You can’t just power it off, without breaking the OS. Since it runs Linux the setup is a bit more complex. It’s not difficult, just complex. For me the benefits aren’t worth the price. The only feature that I would really benefit from is the ability to upload a Gcode file via WiFi.
After playing around with OctoPrint I went back to running between the printer and the PC with the SD card in my hand.
Recently I’ve found another, interesting project. That is ESP3D. It’s a similar idea to the OctoPrint except it’s running on an ESP8266 or ESP32 microcontroller. Well that sounds simpler than running a full Linux machine, and indeed it is. Just find 5V and GND pins to power the micro. Connect ESP’s UART to printer mainboard’s UART and you’re done.
The projects are similar but they aren’t the same! OctoPrint acts as a host, meaning it feeds the instructions to the printer from a file stored in the Raspberry Pi’s memory. ESP3D acts only as a web interface to your printers UART port.
Since I have a few ESP32s laying around I’ve decided to give it a go. This is my experience of connecting my Ender3 to WiFi via a ESP32 microcontroller.
Preparing ESP32 <
Before any hardware fun, I’ve flashed the ESP3D onto my Lolin D32 Pro board. That means cloning the repo:
git clone https://github.com/luc-github/ESP3D
cd ESP3D && git submodule update --init --recursive
The project uses the
PlatformIO
environment. That means that building it is a breeze. If you
didn’t use this environment before, you configure it with the
platformio.ini
file. For my board
I had to edit two lines in the
[env:esp32dev]
section:
[env:esp32dev]
...
board = lolin_d32_pro
...
upload_speed = 115200
...
Then a short command to build and upload the firmware:
pio run -e esp32dev -t uploadAnd… done. The ESP3D is ready.
I’ve followed the ESP3D’s instructions on how to set it up. At the beginning you connect to the ESP’s access point. You upload the archived frontend, go through a setup wizard, which allows you to connect the printer to your home network. From this point on the printer will be just another device in your network, that you can connect to.
Connecting… with whatever I had laying around <
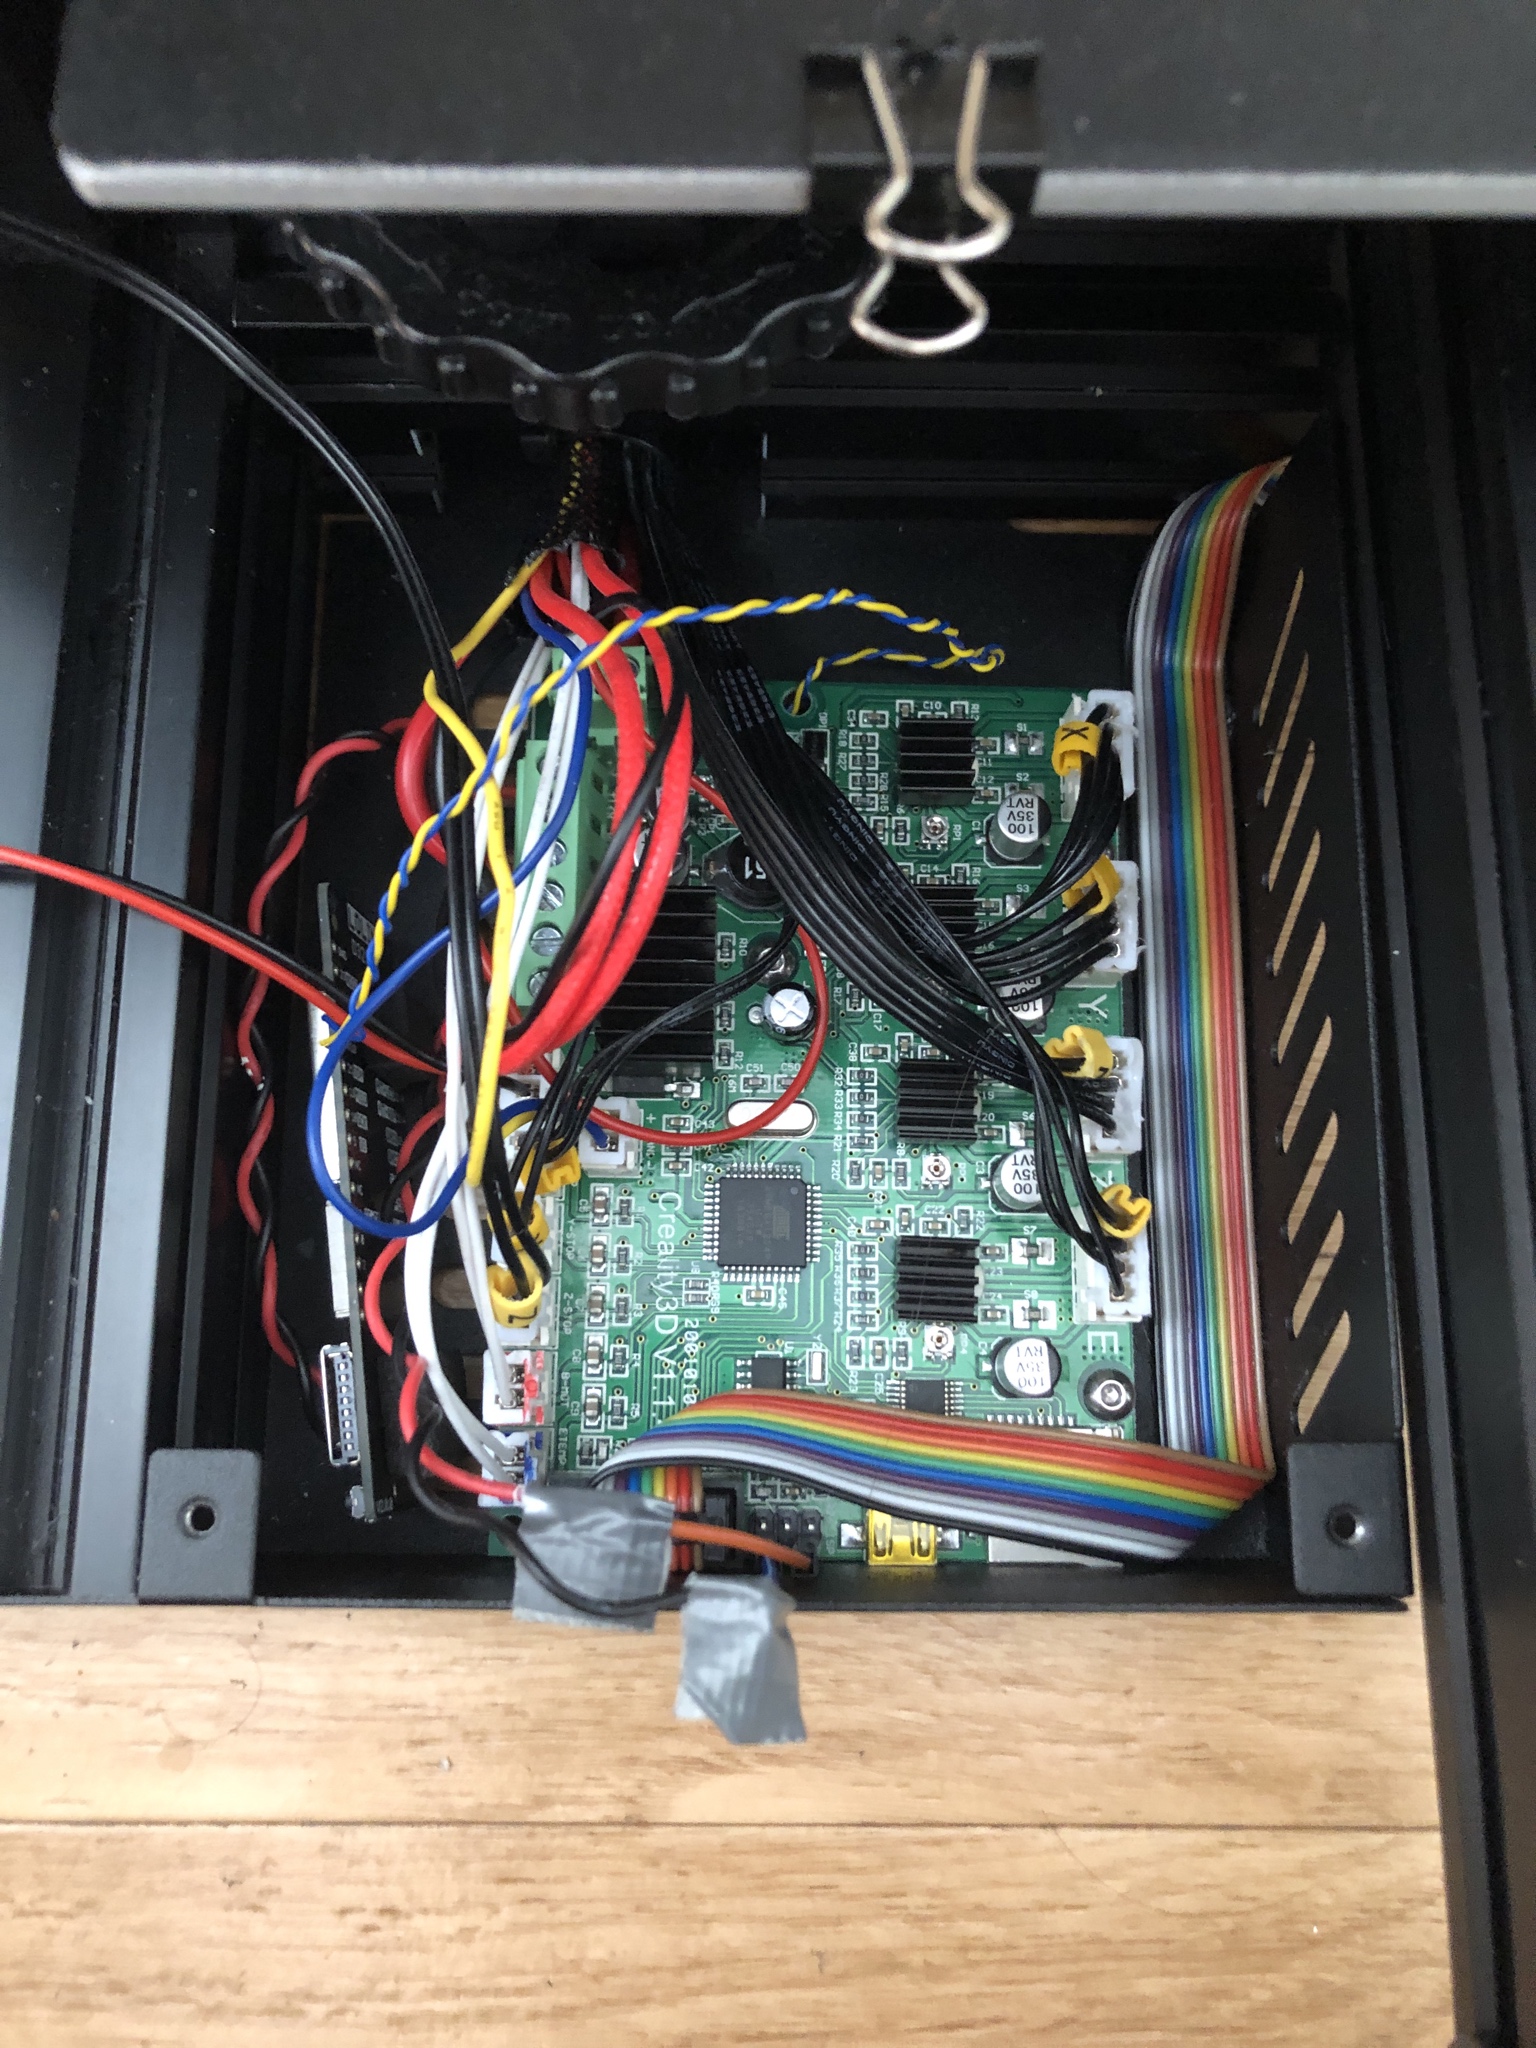
I’ve started by taking out the printer’s mainboard. This step wasn’t easy. There is a lot of connections, a lot of different connector types, some covered with glue (fortunately fairly easy to remove). I suggest taking a lot of photos when disassembling something like this. It makes reassembling trivial.
This link explains where to find the power and the Rx, Tx pins on the printer’s PCB. Connecting to the UART pins requires some solder mask scraping, but that’s fine. I plan to upgrade to the BigTreeTech’s SKR board soon so I feel fine with some destructive experimentation.
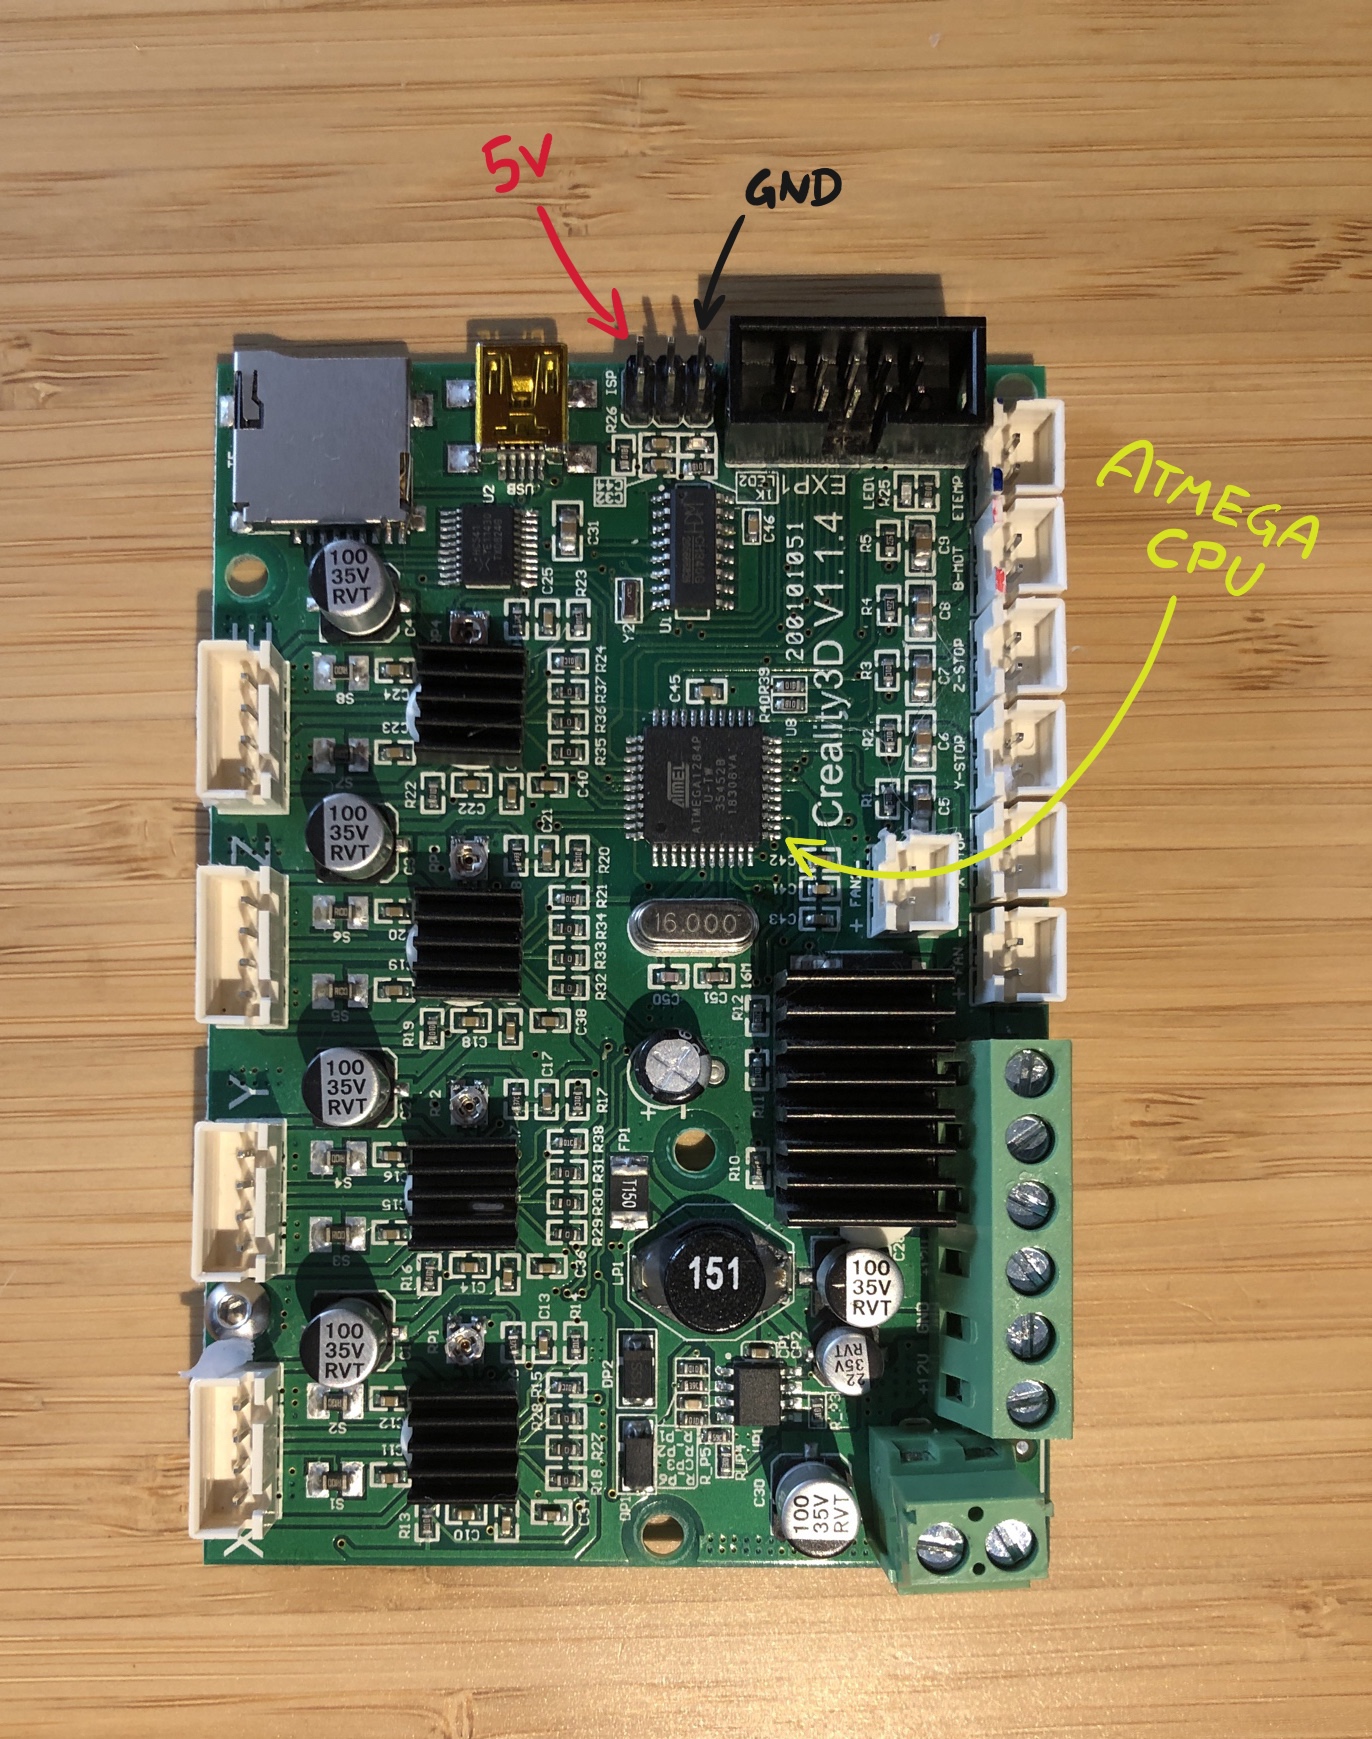
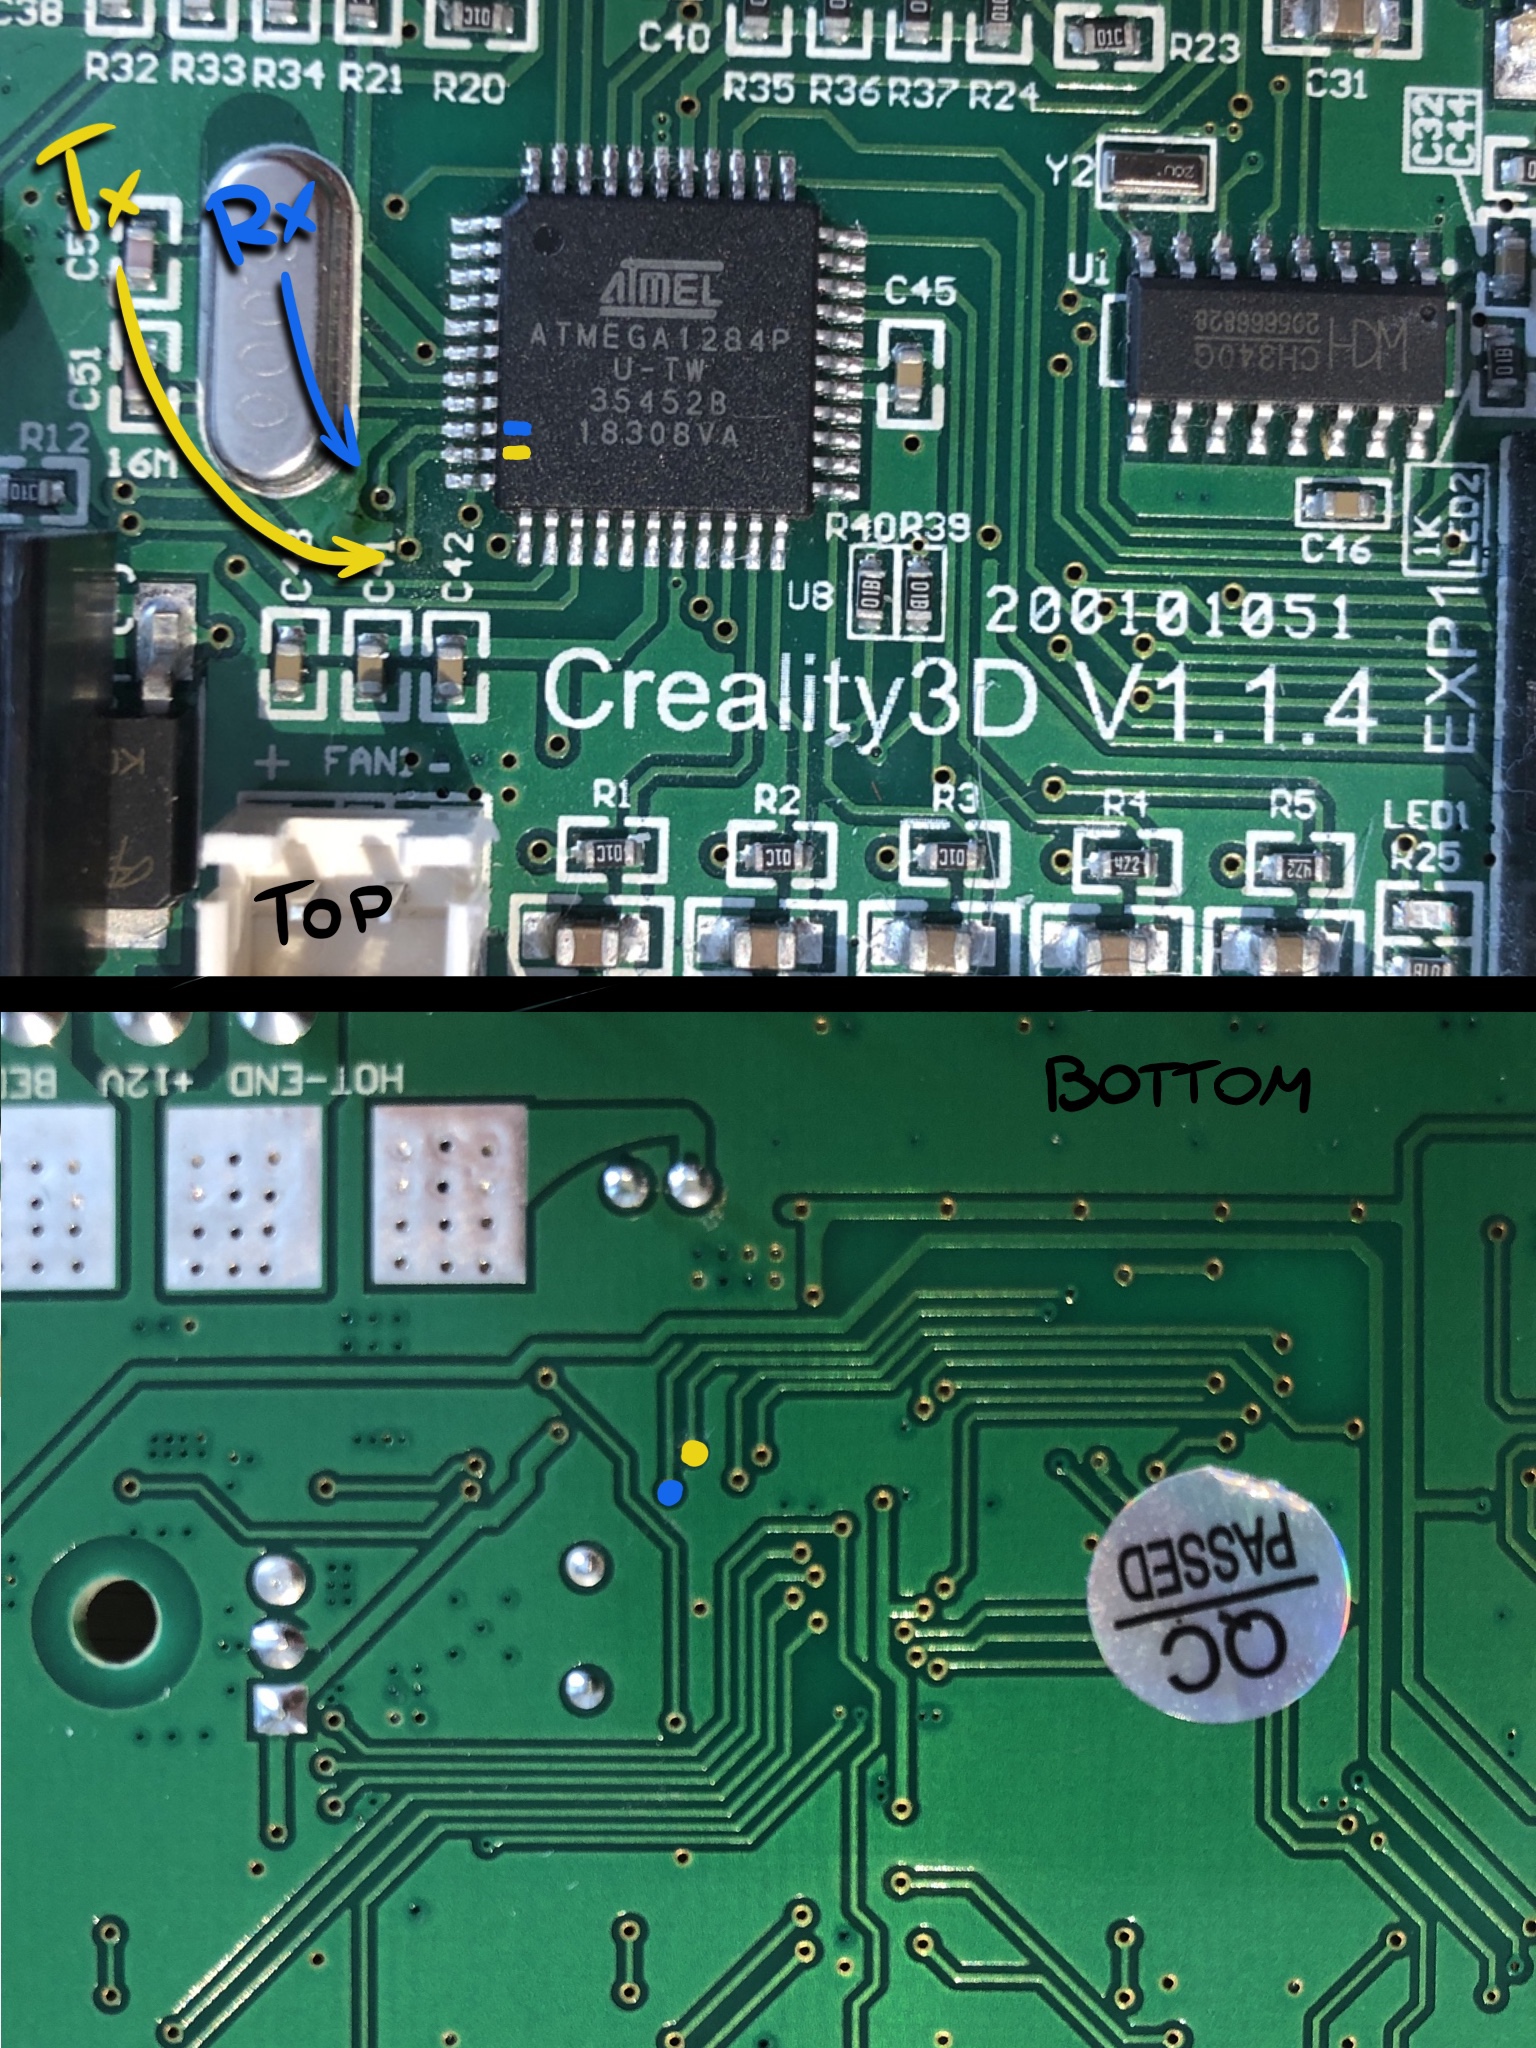
I’ve scraped off the solder mask, from the UART pins’ paths. If you ever try to do this yourself, I’d advice being patient and doing it slowly. You just want to expose the copper but not damage the path.
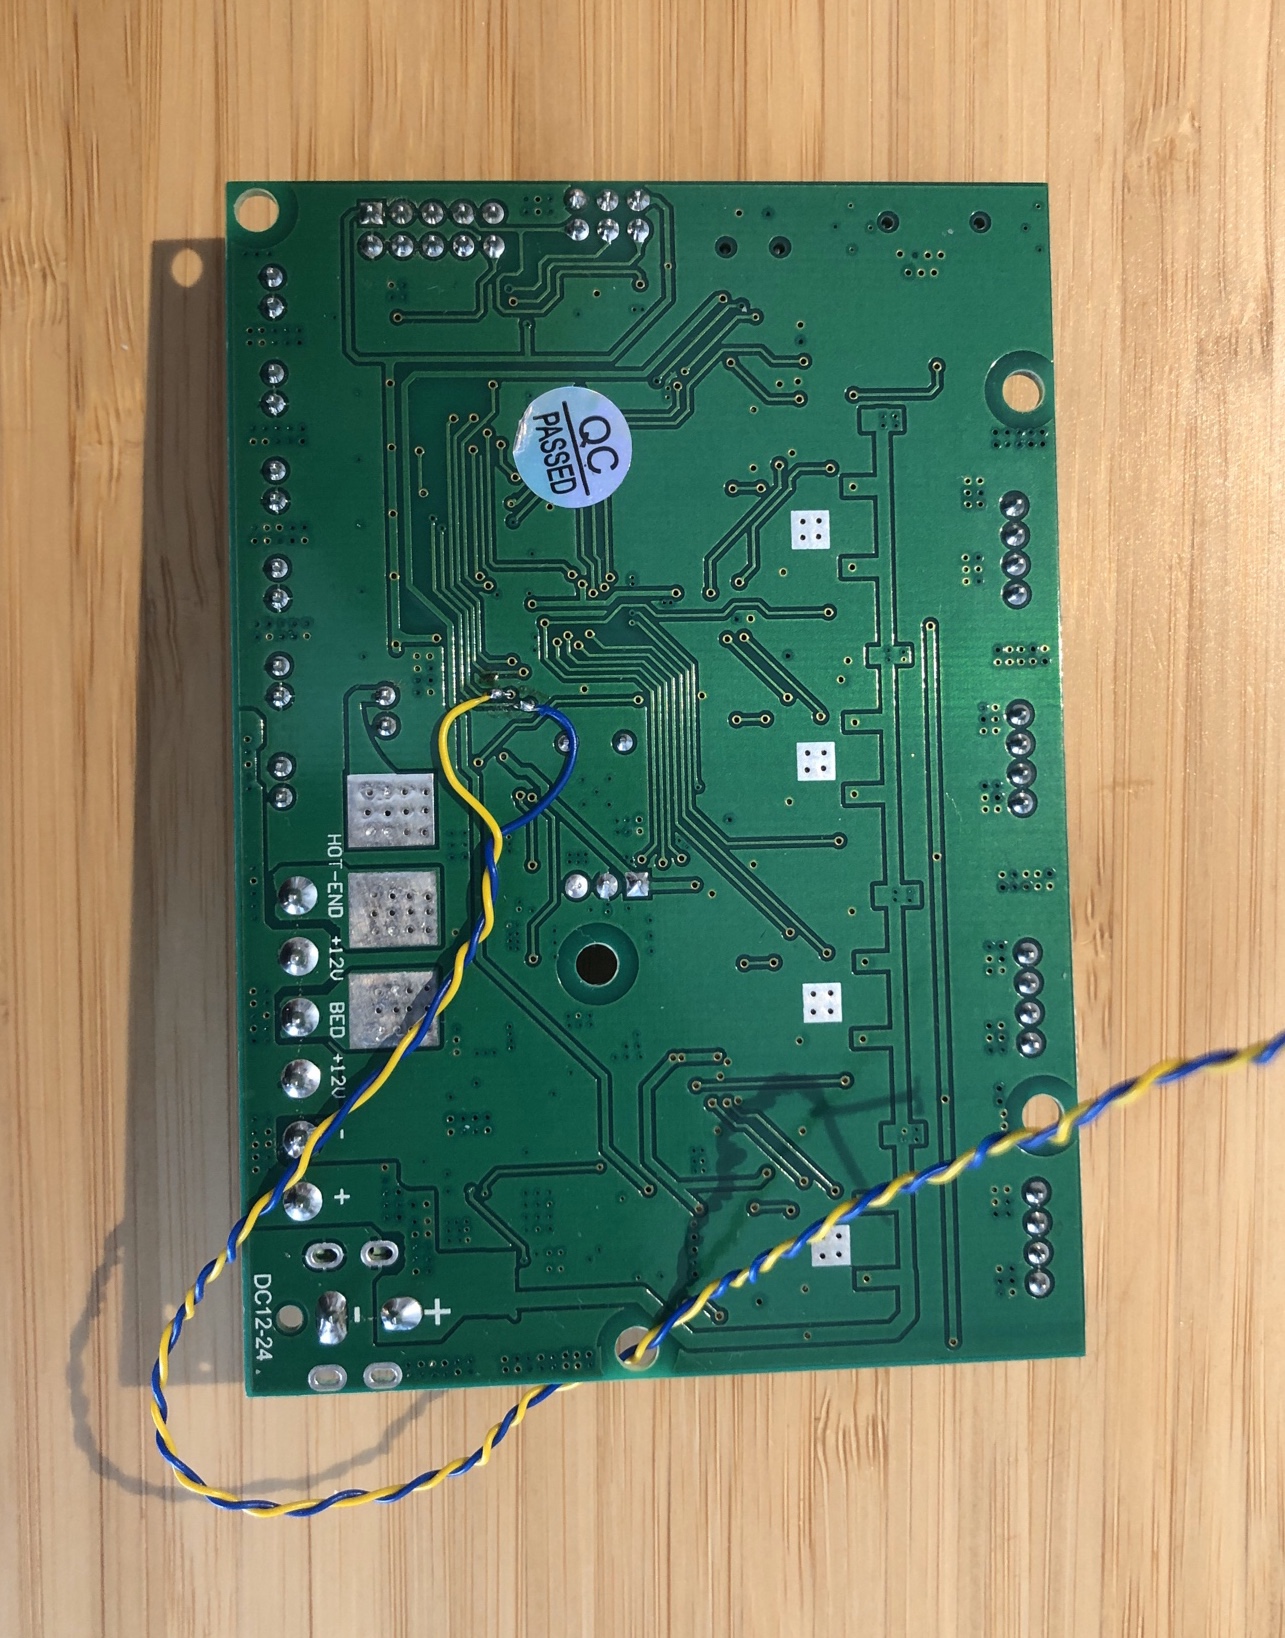
Below you can see the ESP32 connected to the UART pins. The wires supplying power to the ESP32 aren’t something I’m that proud of… The twisted pair of red and black wires, originally, end with a 2 pin female connector. Since there is one pin between GND and 5V on the Ender’s board I couldn’t use that connector. I’ve scrounged one pin female wires and soldered those to the original, twisted pair. I also didn’t have any heat shrinking tubing… Don’t worry I didn’t just leave those wires exposed.
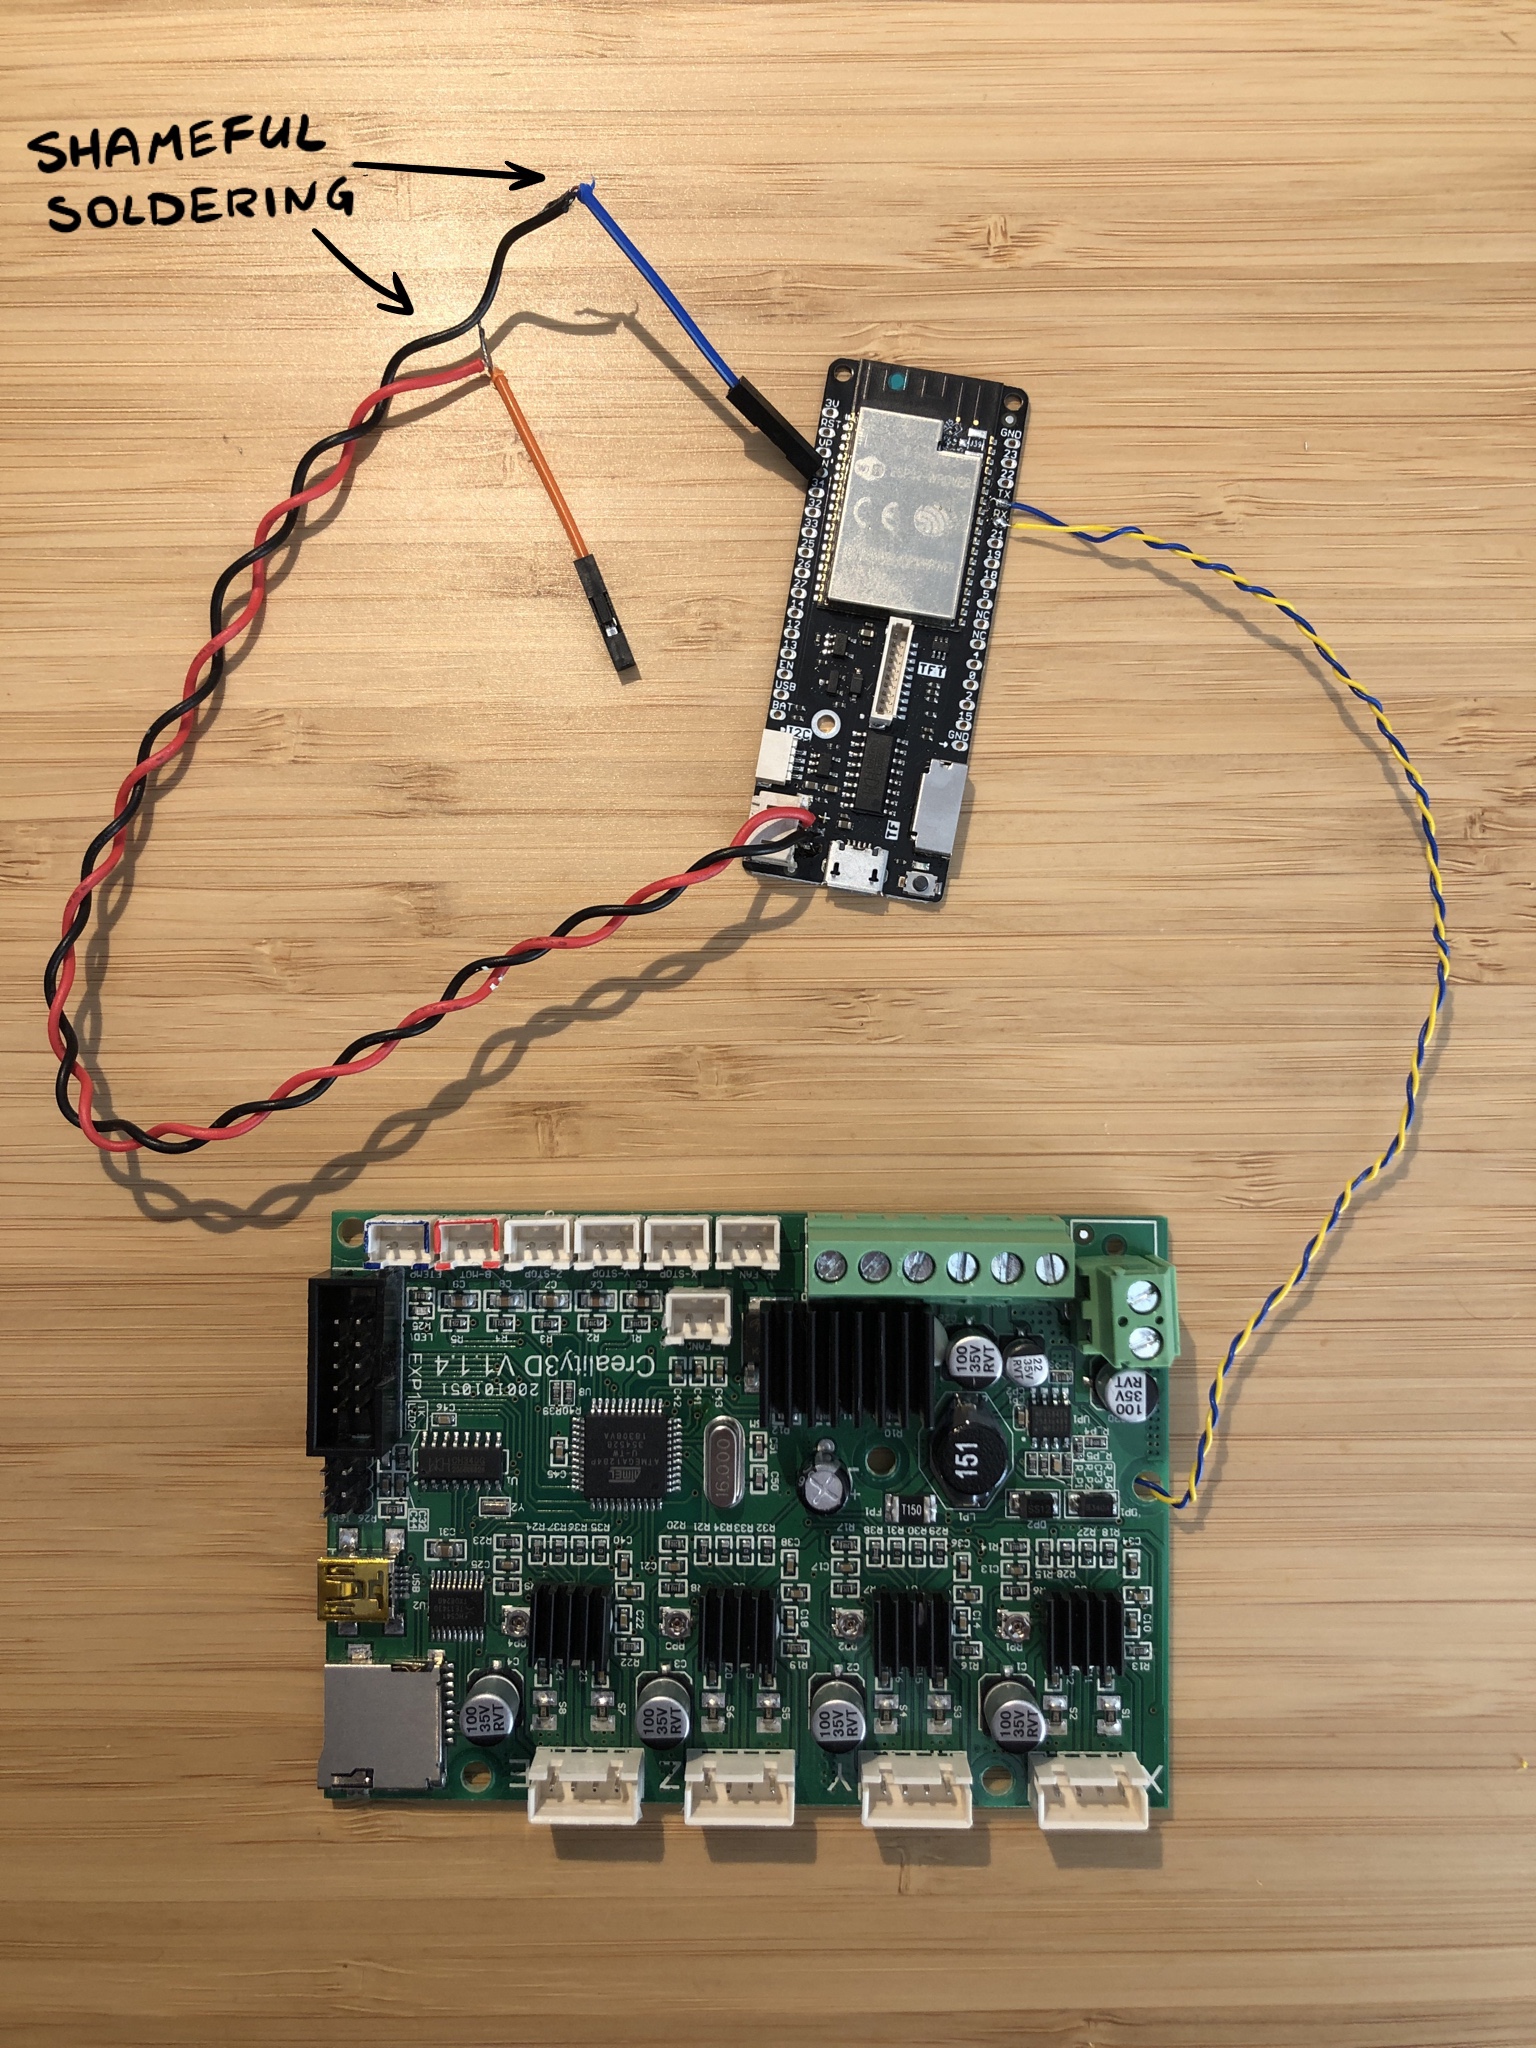
It’s worth pointing out that the power wires are soldered to the battery connector terminals. If you look at the Lolin D32 Pro’s schematics you’ll see that there is no pin dedicated for the external voltage input. With a bit more reading I’ve learned that the best way to connect external power is to do it through the battery connector. As long as the voltage stays above 4.2V, the charging circuit won’t try to push the charge back. That way the 5V will pass through the entire voltage regulating circuit on the board.

The shameful soldering could have been avoided if I had a 2 pin male connector used by a matching battery. As soon as I get one I’ll fix this. Don’t settle for improvised engineering.
Ok… so this goes here… <
I’ve reassembled the mainboard, putting the ESP32 board next to it.
I’ve secured the shameful soldering with a strong tape. It will do for now. I’ve also glued some small EVA foam pads on the bottom of the Lolin board. That protects the board from accidental shortening with… something, anything. If I’ll stick with ESP3D I’ll probably secure it even more. I really don’t want to burn my place down.
Time to boot!
What’s the verdict? <
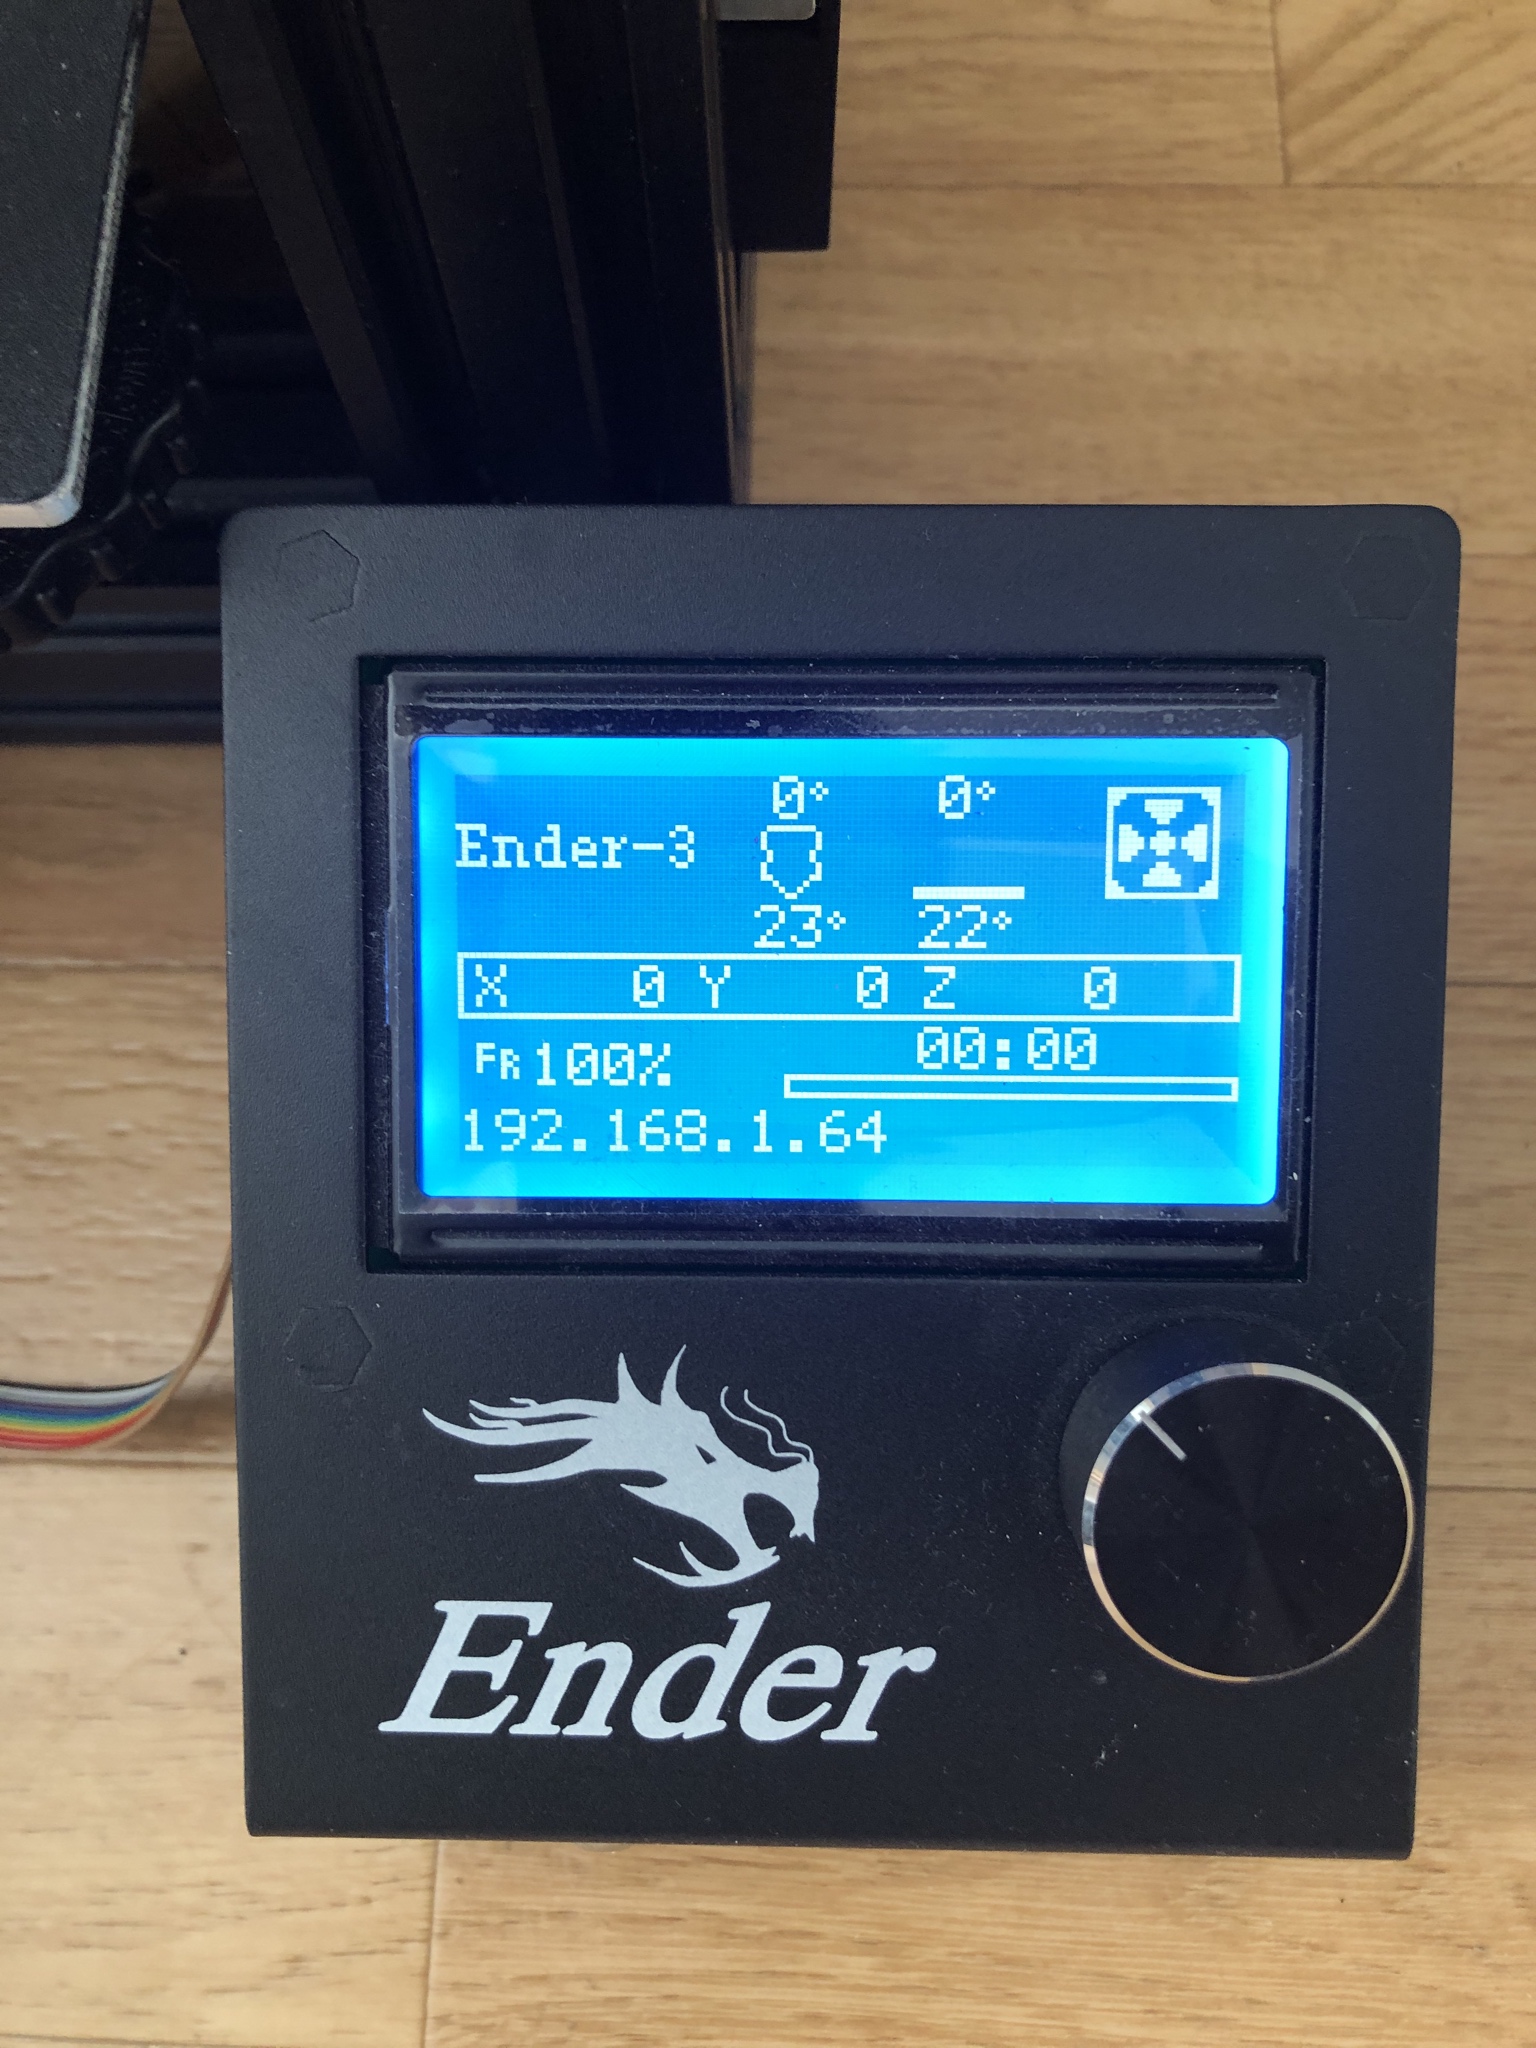
I’ve turned the printer on. No weird sounds, no smoke, everything seems to be OK. I was surprised to see the printer displaying its IP on the LCD screen. I really didn’t expect that. I thought I’ll have to check the IP in the router’s settings. Neat!
Putting that IP into your browser opens the ESP3D’s web interface.
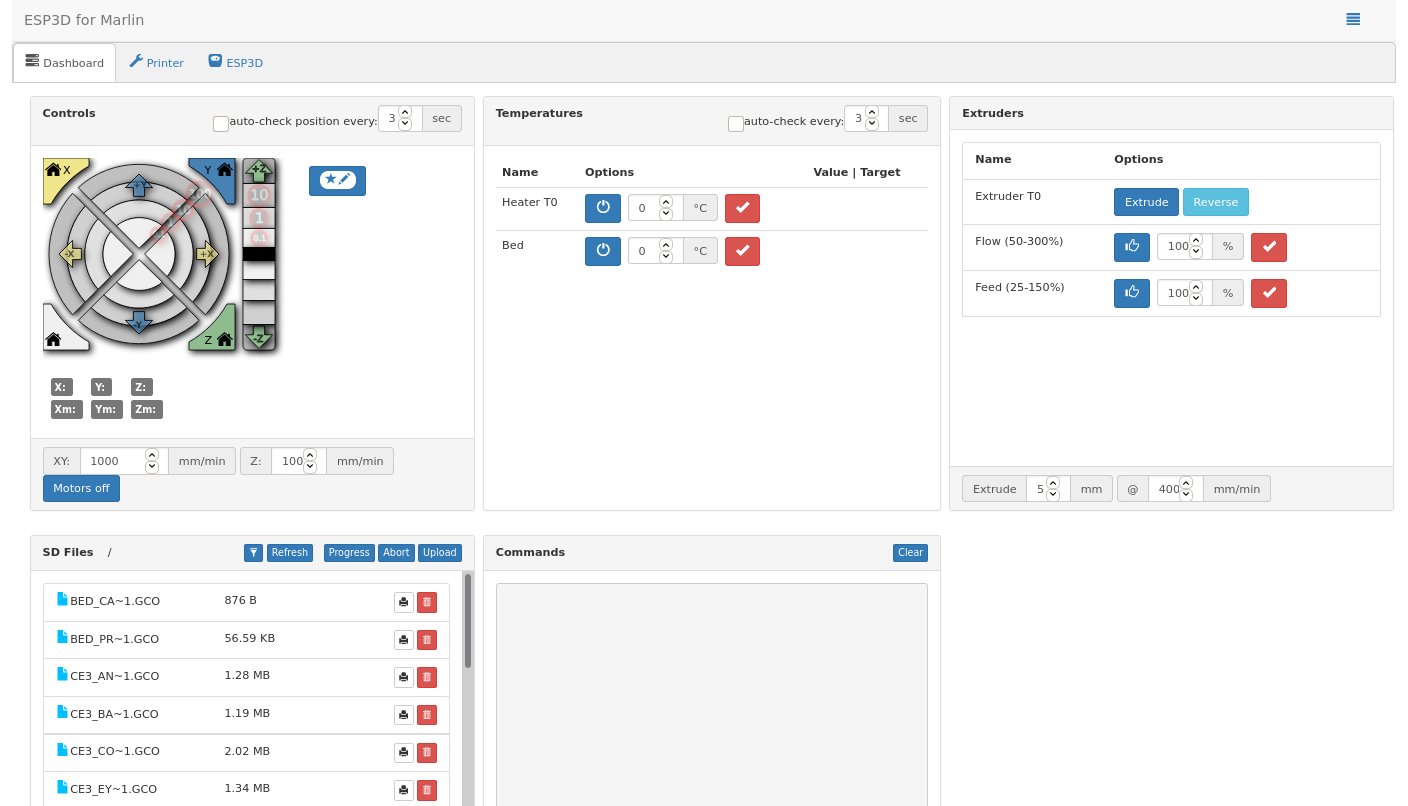
I’ve started a bed levelling print (because the bed can always be leveler!). Everything went well. Controlling the printers movement worked fine. No problems with setting or plotting the bed’s or nozzle’s temperature.
Lets get to the disappointing parts…
File uploading is horrendously slow. This isn’t ESP3D’s issue. The problem is that when ESP3D writes the file into the SD card it doesn’t access the card directly. It communicates via UART with the Ender’s CPU, requesting to write something to the SD. The fact that there is an intermediary between the ESP and the SD card makes this problem hard to solve. If you visit the Issues tab in the ESP3D’s Github page. You’ll see a pinned issue which explains it and suggests ways to work around it. This flaw is heart breaking. I knew about it before I started working on this project but I needed to know how bad it is… it’s bad.
ESP3D version 3 promises to solve it by acting as a host. That would mean the ESP32 would store the files on an SD card connected directly to its board and feed the instructions to the printer’s firmware during the print. Considering my board has a SD card slot, that would solve this issue for me.
Another weird issue is file naming. When you upload a file it has to be in a 8.3 format. What is 8.3 format? 8 characters for the file name and 3 characters for the extension. Why? Because Marlin firmware doesn’t support other file name formats. You can save a file named without those restrictions on your SD card and print it without a problem. The limitation creeps in when you do it via the UART commands. Remember that that’s the only way the ESP3D communicates with the printers firmware. ESP says “hey, just wanted to create a file with a name XXX on the SD card”, and Marlin answers “nah, I don’t support names like XXX. 8.3 file name format or bust!”. ESP3D can’t solve this issue in the current form. Acting as a host should solve this issue too since the Marlin will never have to know about the file. I need to research why Marlin keeps this limitation…
Those are the two main issues I have with this project at the moment. I will keep the Lolin plugged in. Power cycling a microcontroller won’t hurt it. It can wait there until the ESP3D v3 gets released. As soon as that happens I will just connect it with a USB cable to a computer, run a simple shell command and update the software. Is it better than the OctoPrint? Well… no…? OctoPrint is a better experience, for sure. Personally I prefer having a very small, low power board which serves one purpose, instead of having a full Linux running board. Your needs might be different.
OctoPrint vs ESP3D is, in part, a cost vs benefit discussion. I find it to be a more and more important part of my decision making.